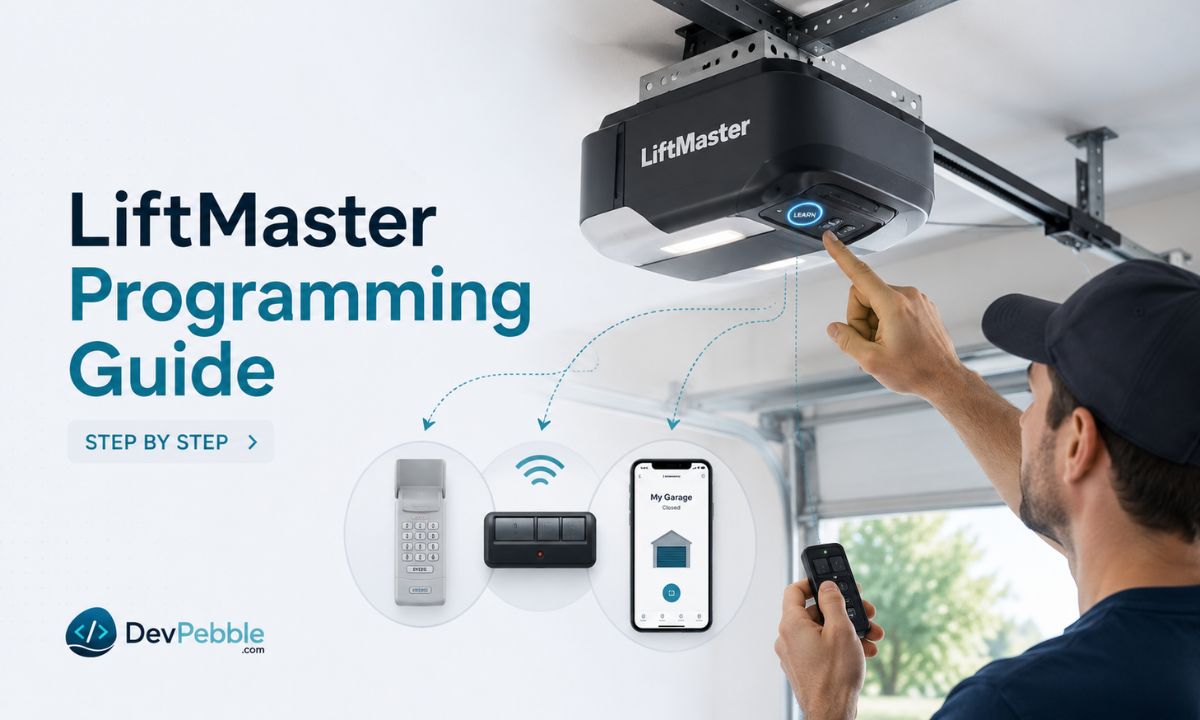
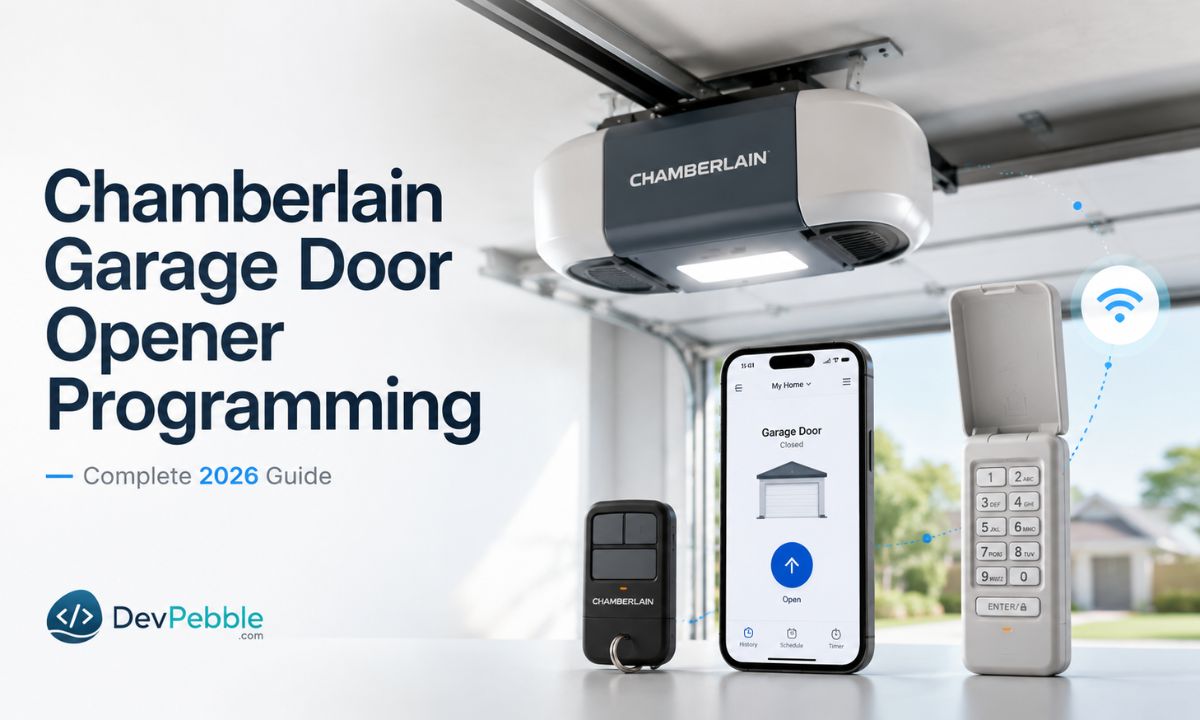
Chamberlain garage door opener programming: complete 2026 guide
A complete 2026 guide to Chamberlain garage door opener programming — find the Learn button, decode its color, pair a remote, keypad, or the myQ app, set a keyless entry PIN, program your car's HomeLink, and fix an opener that won't program.
On this page⌄
- What it means to program a Chamberlain opener
- How to find the learn button on a Chamberlain opener
- What the learn button color tells you
- Safety steps before you start
- How to program a Chamberlain remote
- How to program a Chamberlain keypad
- How to set or change a keyless entry PIN
- How to set up the myQ app
- How to program a Chamberlain opener to your car
- How to reprogram after a reset or memory wipe
- Why your Chamberlain opener won't program
- A quick compatibility check before you buy
- A few last things
Maybe your remote quit on you, you just mounted a new keypad, or the myQ app refuses to connect. Whatever brought you here, you want a clear walkthrough of Chamberlain garage door opener programming that doesn't assume you already speak fluent garage tech. Good news: most Chamberlain models run on the same basic logic, even when the button colors and exact steps shift a little between units. This guide, current as of June 2026, breaks the whole thing into plain steps so you can get your opener, remote, keypad, or app working again without much trial and error.
What it means to program a Chamberlain opener
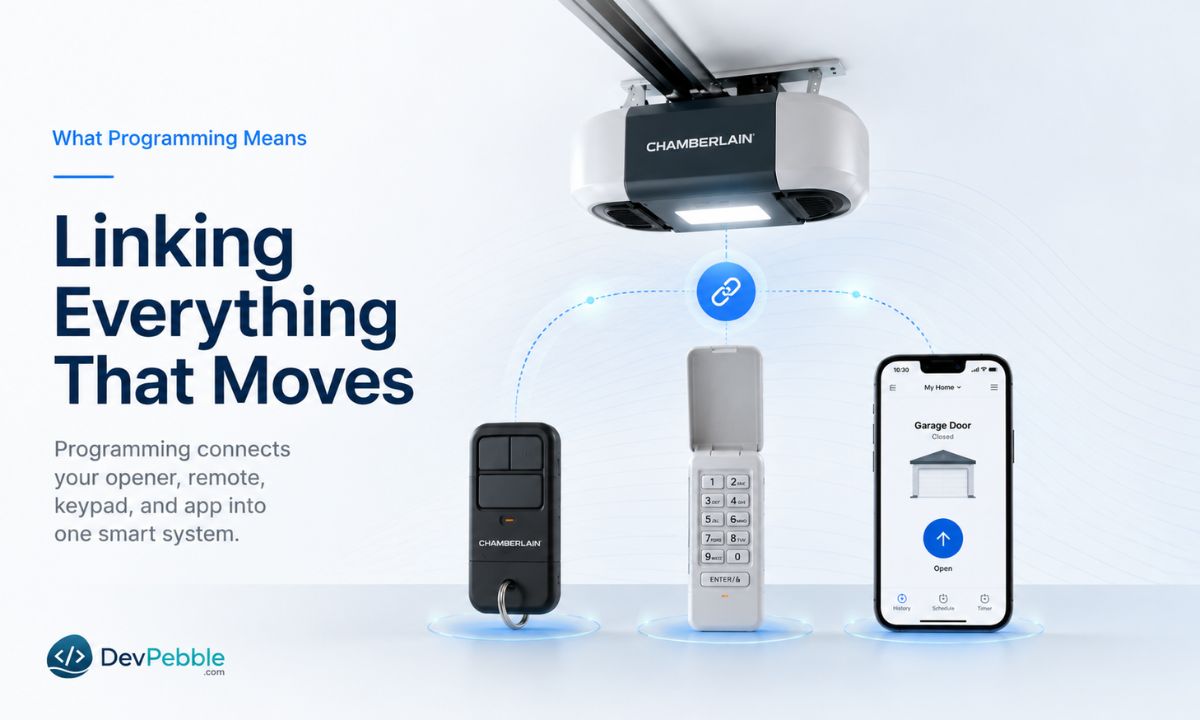
In plain terms, programming teaches your garage door motor to recognize a specific remote, keypad, or phone app as an authorized device. The opener has a small bit of memory that stores signals from those devices, and programming simply adds or removes an entry in that memory.
In practice, that means a handful of common jobs. Pairing a remote so a button press tells the motor to open or close. Setting up a keypad with a PIN so you can get in without carrying anything. Connecting a compatible opener to the myQ app for phone control, alerts, and access from wherever you are. And reprogramming after a reset, battery change, or new remote, since any of those can clear stored codes or force you to re-add a device.
The reason the steps vary comes down to age. Older units use rolling codes with a simple Learn button sequence, while newer myQ-enabled openers layer app setup on top of the physical button presses. None of it needs special tools. In most cases you just need the opener, the device you're adding, and a few minutes of patience.
How to find the learn button on a Chamberlain opener
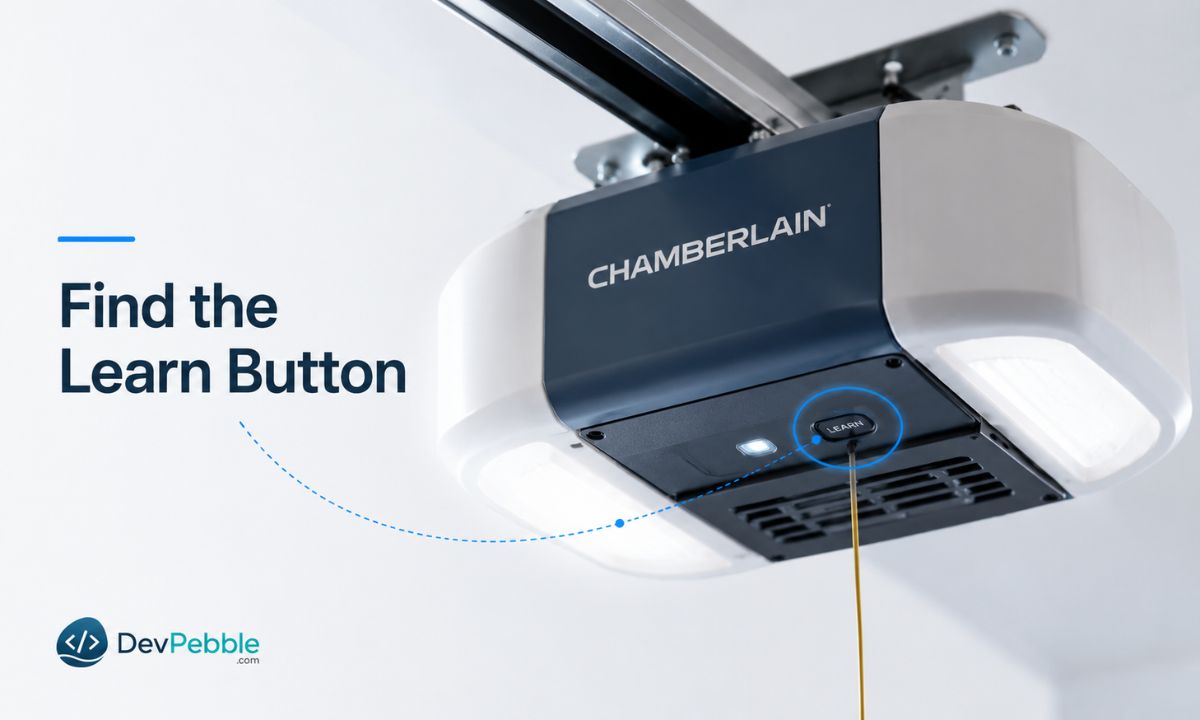
Before you program anything, you have to find the Learn button, which some manuals call the Program button, on the motor unit. That is the box bolted to your garage ceiling that drives the door.
On most Chamberlain models the Learn button sits near where the antenna wire exits the unit, usually on the back or side panel. On some models it hides under the light cover, so you may need to gently pop off or lift the plastic lens to reach it. If you are standing in the garage looking up, the controls are often on the left side of the motor head, close to the up and down adjustment arrows.
One caution is worth repeating before you press anything. A quick tap of the Learn button drops the opener into programming mode, but holding it down does something very different. On the square red, orange, green, and purple buttons, holding the Learn button for about six seconds wipes every remote and keypad from memory, and the light above the button turns off when the wipe finishes. So unless you want a clean slate, press and release. Do not hold.
What the learn button color tells you
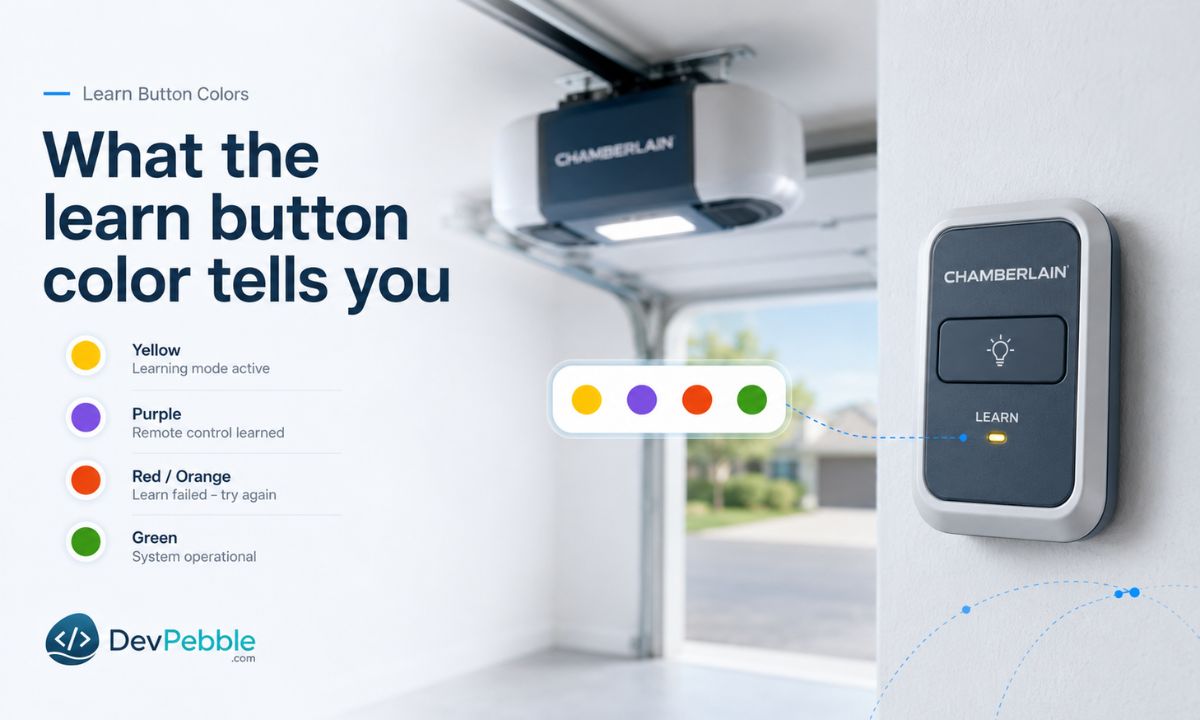
The color of your Learn button is not decoration. On Chamberlain Group openers, which include Chamberlain, LiftMaster, and many Craftsman models, the color signals the opener's radio frequency and which technology generation it belongs to. That in turn decides which remotes and keypads will pair with it. Here is the breakdown, oldest to newest:
- Green is the oldest of the group, found on many mid-1990s units. It runs at 390 MHz using Billion Code technology.
- Red or orange means 390 MHz with Security+ rolling code, common on openers built from roughly 1997 to 2005. Faded red can look orange, which is why both names show up.
- Purple means 315 MHz with Security+ rolling code, typical of units made from the mid-2000s into the early 2010s. Faded purple sometimes reads as brown.
- Yellow is the newest, signaling Security+ 2.0 technology that arrived around 2011. These round yellow buttons run at 310, 315, or 390 MHz, and they are the ones built for myQ.
This matters more than it looks. A remote made for a purple-button opener will not pair with a yellow-button opener, even though both wear the Chamberlain name. So if you are replacing a lost remote, do not grab the first universal clicker off the shelf. Match the remote's compatibility list to your opener's model number and Learn button color first. Skipping that one check is among the most common reasons a brand-new remote refuses to program no matter how many times you try.
If your button has faded past the point of recognition, the model and part number printed on the motor unit, on the same side as the Learn button, will confirm the frequency.
Safety steps before you start
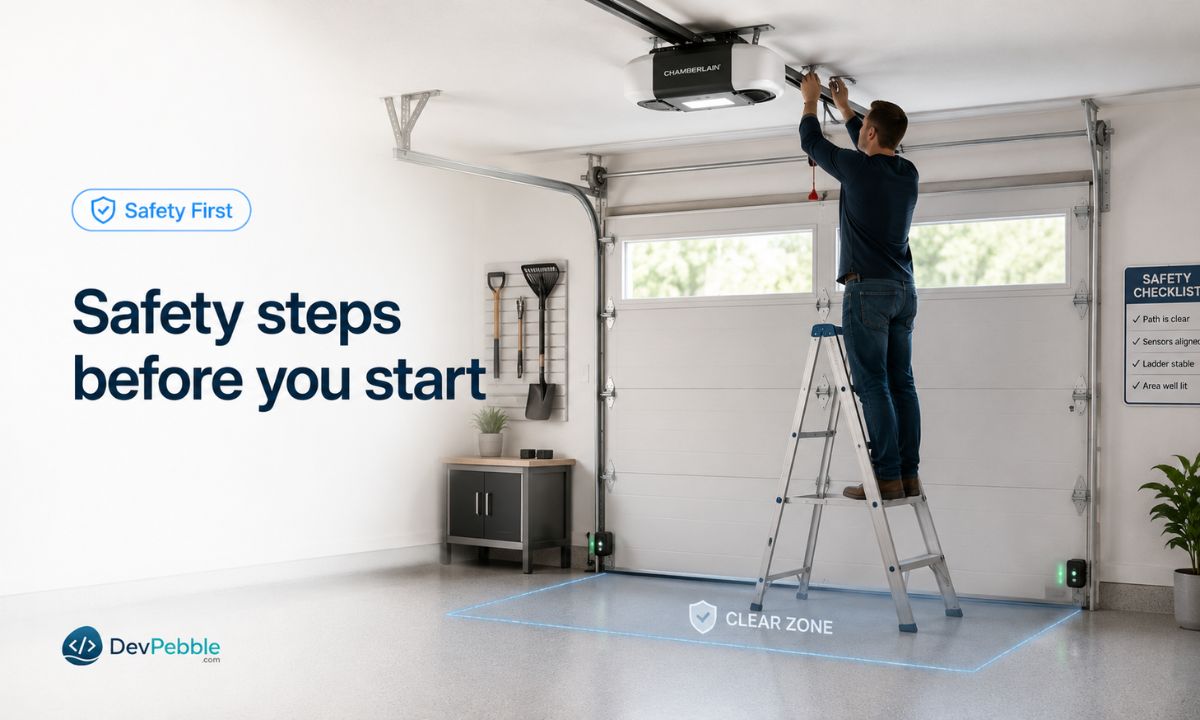
Garage doors are heavy and motorized, so even a routine programming session deserves a little care. Keep people, pets, and anything breakable away from the door while you test remotes or keypads, because the door can move when you least expect it. Never let anyone stand under a moving door, even for a second.
Check that the safety sensors, the little eyes near the bottom of each track, are clean, lined up, and unobstructed before you test, since some openers will not run a full cycle if the sensors are unhappy. If you need to reach the motor on the ceiling, use a proper ladder rather than balancing on a chair or a stack of boxes. Keep kids away from remotes and PINs too, both for their safety and to avoid surprise door openings. And when the steps in any general guide do not match what you are seeing, your specific model's manual wins, since press durations and button spots vary between product lines.
How to program a Chamberlain remote
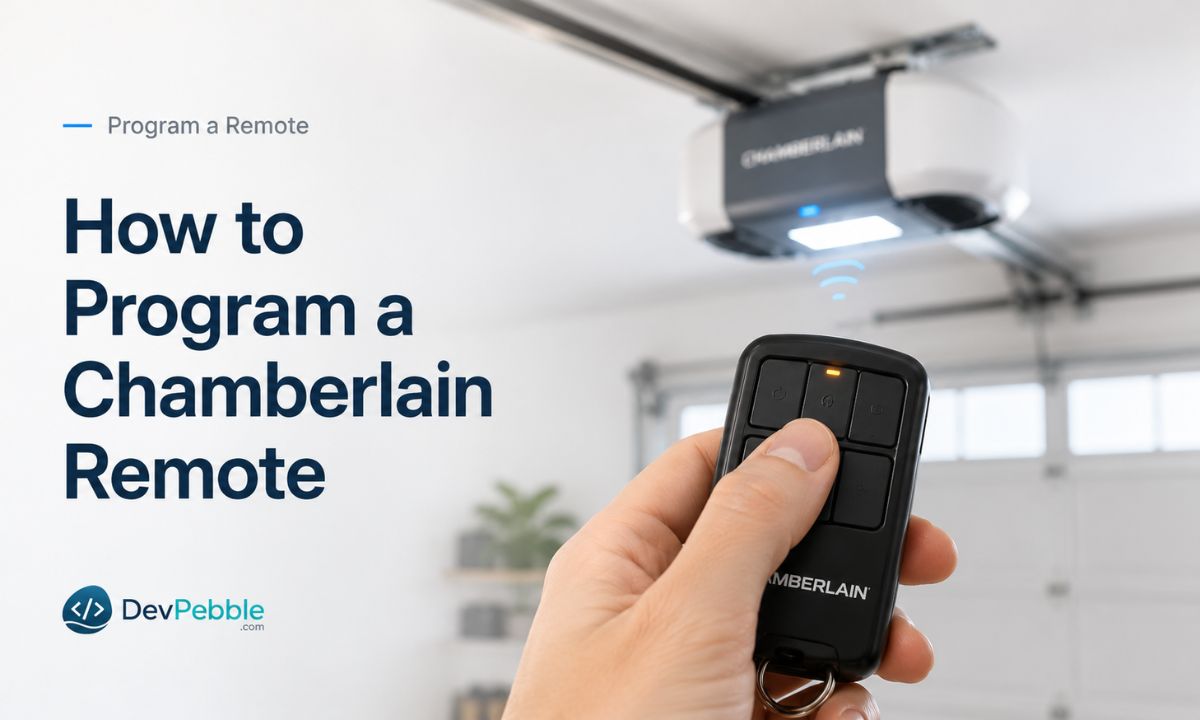
Once you have found the Learn button, pairing a remote follows a simple rhythm:
- Locate the Learn button on the motor unit, near the antenna wire or under the light cover.
- Press and release it. You do not hold it down here. A quick press puts it into programming mode, and the indicator light near the button usually turns on or starts blinking.
- Press the remote button you want to program, and do it reasonably quickly. On most Chamberlain models you have about 30 seconds, though many newer yellow-button units give you up to two minutes.
- Watch for the opener lights to blink or listen for a click. That is the opener confirming it accepted the remote.
- Test it. Stand a safe distance from the door and press the button to make sure it opens and closes.
That covers most standard setups, but exact steps can differ by remote and opener model. Some newer remotes use a slightly different button sequence. If yours does not pair on the first attempt, check your manual or Chamberlain's support page for your specific model before deciding something is broken. And if you ever need to reprogram a remote after a battery swap or a memory reset, the same steps apply.
How to program a Chamberlain keypad
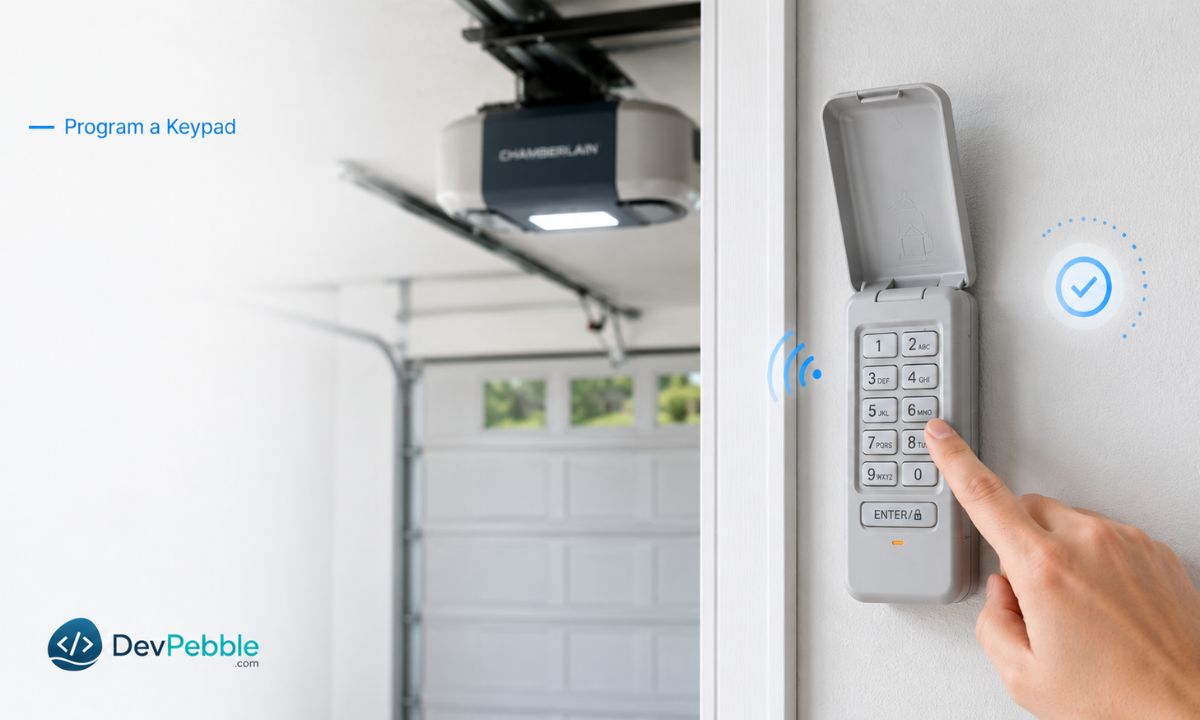
A keypad lets you open the garage without carrying a remote, which is handy if you run, walk the dog, or just lose things. Setup is a lot like pairing a remote, with a PIN added:
- Locate the Learn button on the motor unit, same as before.
- Press and release it to enter programming mode.
- Enter a four-digit PIN on the keypad itself. Pick something you will remember but a stranger would not guess.
- Press Enter, or follow your model's confirmation step, since some keypads use a different button or sequence.
- Test it by entering the PIN from a safe distance and watching the door respond.
If the keypad does nothing during setup, do not assume the programming failed. Replace the keypad battery first. A weak battery is far and away the most common reason a wireless keypad cannot push a signal strong enough to reach the motor.
How to set or change a keyless entry PIN

Once the keypad works, give a moment's thought to the PIN itself. Choose a secure four digits, and steer clear of the obvious ones like 1234, 0000, or a birth year, especially when several people use the garage. If you have just moved into a place, change the code right away. Previous owners, contractors, or whoever else had access may still know the old one, and updating it is a basic security habit.
Some newer Chamberlain keyless entry models also support temporary or one-time PINs, which are useful for a dog walker, a cleaner, or houseguests who only need access for a weekend. If the keypad stops working later, walk the basics in order: battery first, then confirm the keypad is compatible with your opener model, then check that the opener's memory has not been cleared, which would mean re-pairing the keypad from scratch. Changing a PIN uses the same Learn button routine as the first setup. You are just entering a new code instead of pairing a new device.
How to set up the myQ app
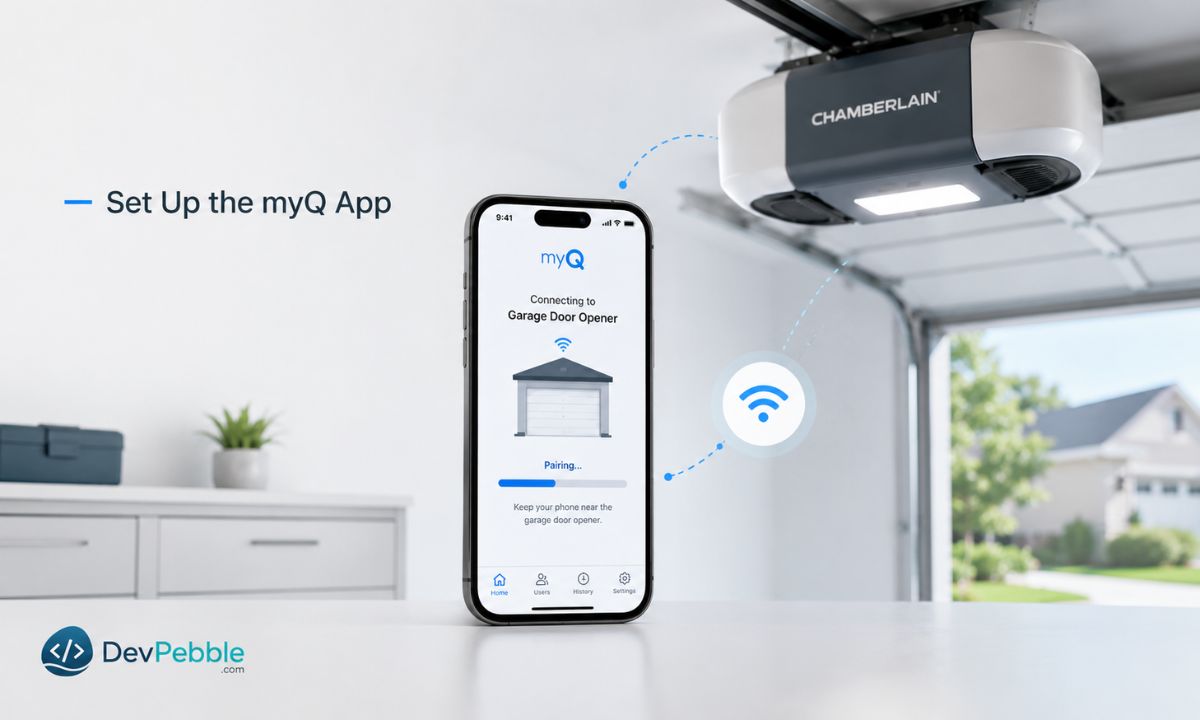
If you want phone control, the myQ app adds remote access, activity alerts, and voice assistant support on top of your regular remotes and keypad. The general flow looks like this:
- Download or open the myQ app on your phone.
- Create an account, or sign in if you set one up for an earlier device.
- Add your opener through the app's setup menu, which walks you through picking your opener type.
- Put the opener into pairing mode, usually by pressing a button on the opener itself or on a separate myQ Wi-Fi accessory, depending on your setup.
- Follow the in-app prompts to name the garage, confirm the connection, and test the open and close commands.
- Check your Wi-Fi signal near the garage, because a weak connection is one of the most common reasons setup stalls halfway.
Worth being upfront here: not every Chamberlain opener supports myQ directly. Openers with built-in Wi-Fi connect straight to the app, but many older units need a separate accessory such as the Smart Garage Control or a myQ hub to add Wi-Fi, and a few simply are not built for smart control at all. Before you assume your opener will pair, check your model against Chamberlain's compatibility tool. Trying to connect an unsupported unit usually just leaves you stuck on a setup screen rather than making any progress.
How to program a Chamberlain opener to your car
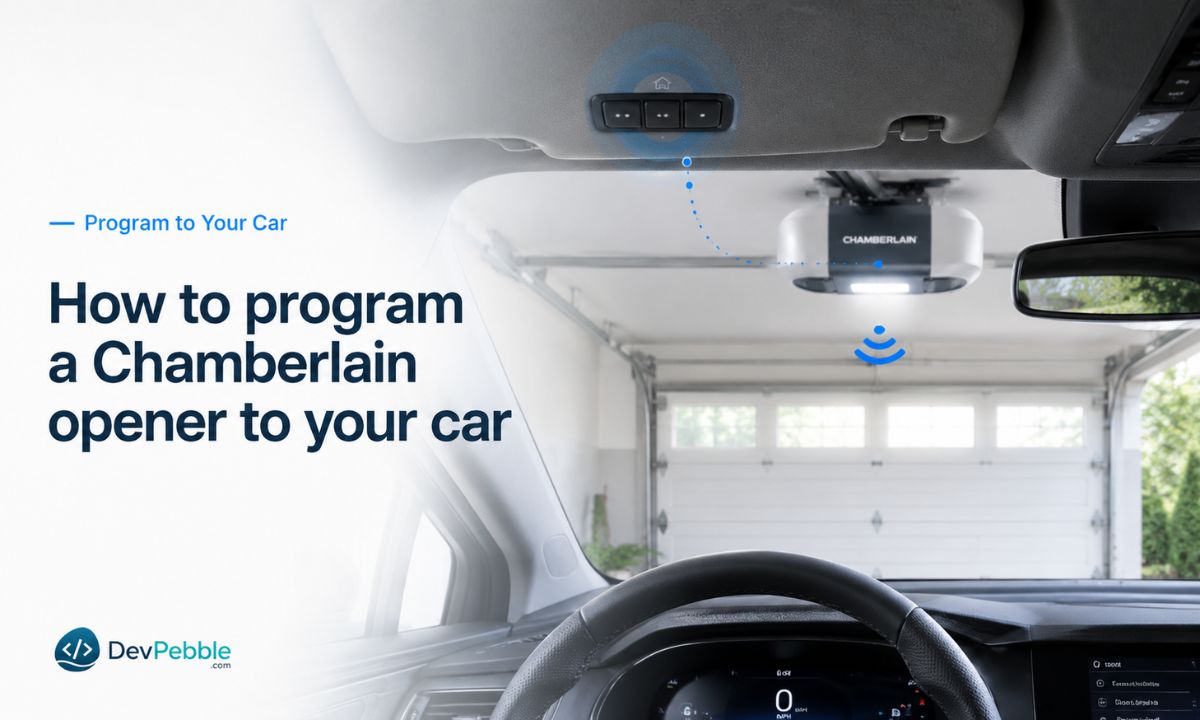
Plenty of newer vehicles can open the garage straight from the visor or the dash through HomeLink, which saves you a clicker rattling around the cup holder. The exact menu differs by car, but the pattern is consistent. Park inside range of the door, hold the HomeLink button you want to assign until its light blinks, then trigger your opener into programming mode with a quick press of the Learn button on the motor unit. Within the time window, press the HomeLink button again to finish the pairing, and test the door.
A couple of catches are worth knowing. Cars built before roughly 2002 sometimes need a HomeLink bridge or compatibility kit to talk to a rolling-code opener, so if your vehicle is older and the pairing will not take, that bridge is usually the missing piece. As always, keep the car parked clear of the door's path during every test, and never run the door while anyone is underneath.
How to reprogram after a reset or memory wipe
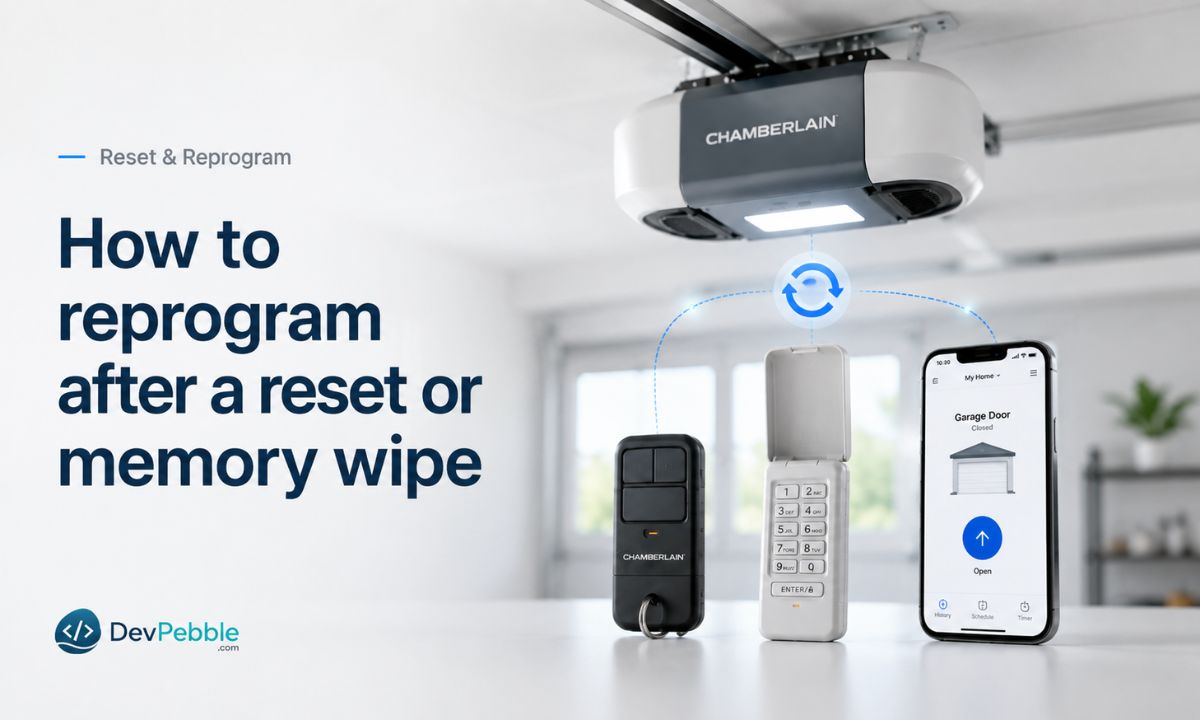
There are a few situations where you will run the programming process again:
- You bought a new remote and need to add it.
- You lost a remote and want to make sure it no longer works, usually by clearing the memory and re-adding the remotes you still have.
- You changed a keypad PIN and want to confirm the new code is live.
- The opener's memory got cleared, on purpose or by holding the Learn button too long.
- You replaced the control board inside the motor unit, which resets stored codes.
- You moved into a new house and want a clean slate for peace of mind.
Clearing the memory removes every paired remote and keypad at once, not just the one giving you trouble. So if you go that route, plan to reprogram every remote, keypad, and myQ connection in the household, because nothing works until you do. One smart habit: reprogram at least one remote right after a wipe, so you are not stuck using only the wall button while you sort out the rest.
Why your Chamberlain opener won't program
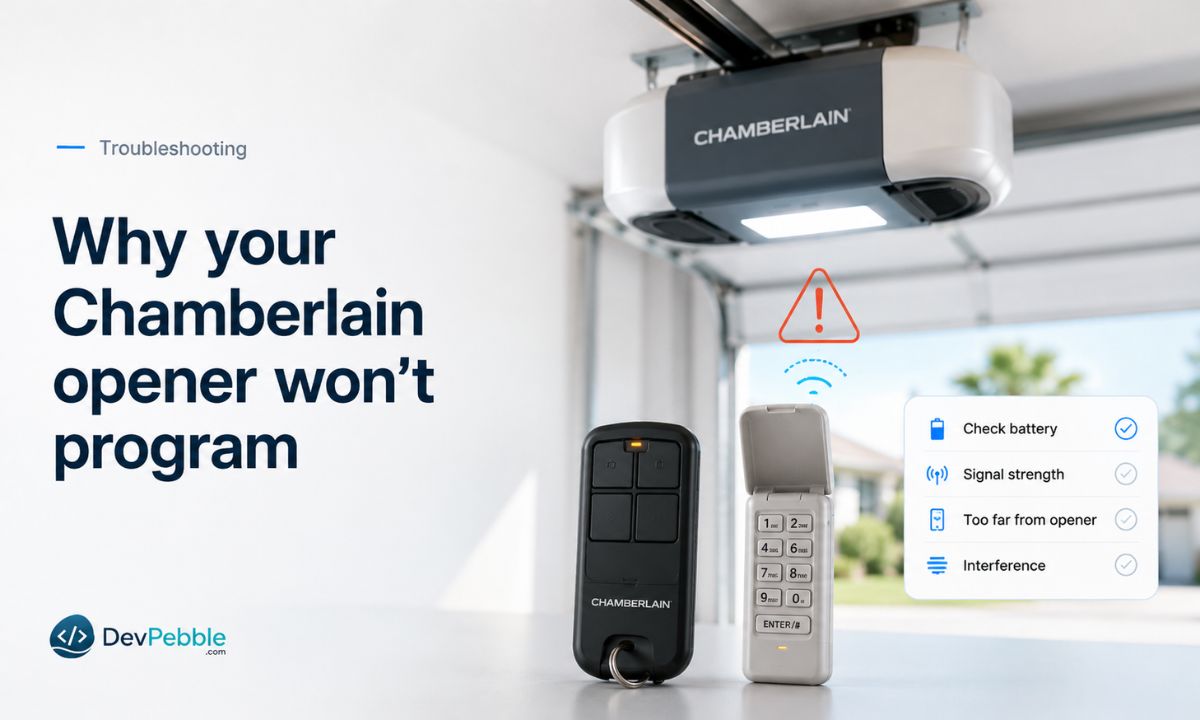
If you have followed the steps and a remote, keypad, or app still will not pair, the cause is usually something on this list, roughly in order of how often it is to blame:
- Weak or dead remote battery. The simplest fix, and the right first guess far more often than people expect.
- Wrong remote or keypad model. Not every accessory matches every opener, and a color mismatch is a classic trap.
- Learn button held too long, which wiped the memory instead of opening programming mode.
- Opener memory is full. Older units have a limited number of remote and keypad slots.
- Keypad out of range. Wireless keypads need a fairly clear signal path to the motor.
- Weak Wi-Fi during myQ setup. Move the router closer or add an extender near the garage.
- Safety sensors blocked or misaligned. Some openers will not fully operate, even during testing, when the sensors are not reading correctly.
- Opener locked from the wall control. Many wall consoles have a lock or vacation feature that temporarily disables remotes.
- A glitch that a power cycle clears. Unplug the opener for about 30 seconds, plug it back in, and try again.
Work down from the top, starting with the easy stuff, and most programming problems sort themselves out without a service call.
A quick compatibility check before you buy
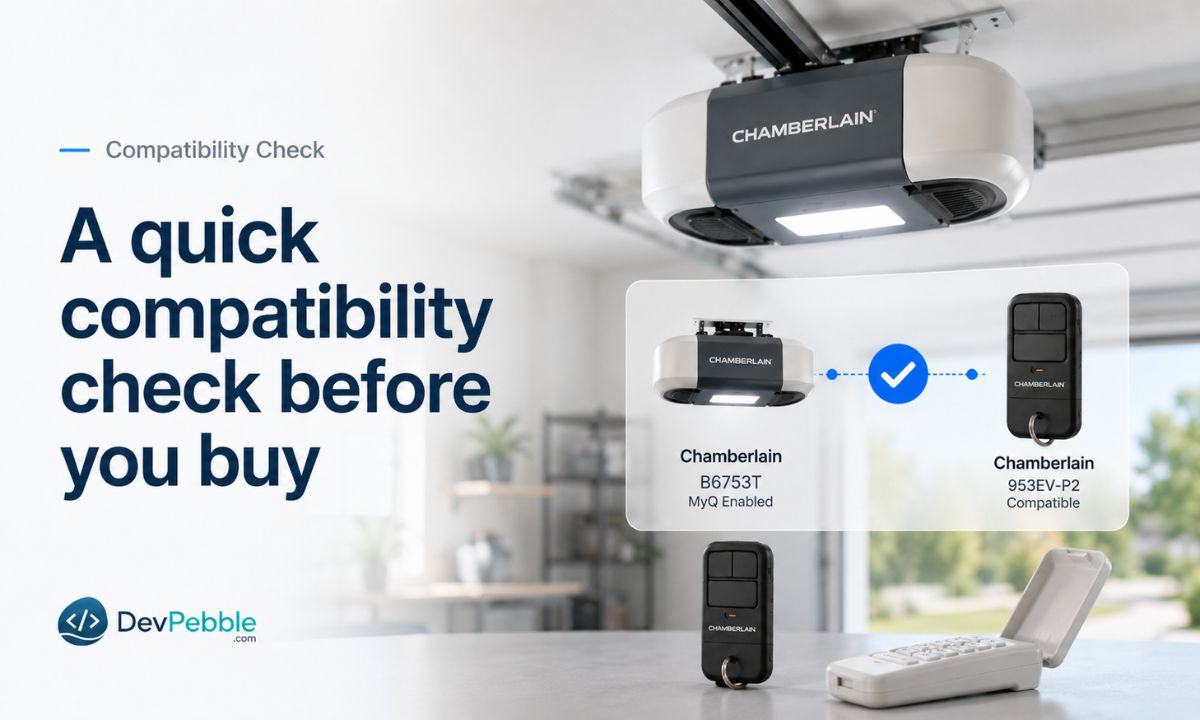
A little homework up front saves a lot of return trips later. Before buying a new remote or keypad, find your opener's model number on the motor unit label, and note the Learn button color while you are up there. Cross-reference both against the accessory's listed compatibility, using Chamberlain's official compatibility info rather than guessing from how the part looks. Universal remotes are a mixed bag: some pair cleanly with Chamberlain openers, others are hit or miss with specific models, so read the compatibility list before you commit. And keep in mind that newer smart openers can follow different rules than older standard units, especially around myQ and Wi-Fi accessories.
A few last things
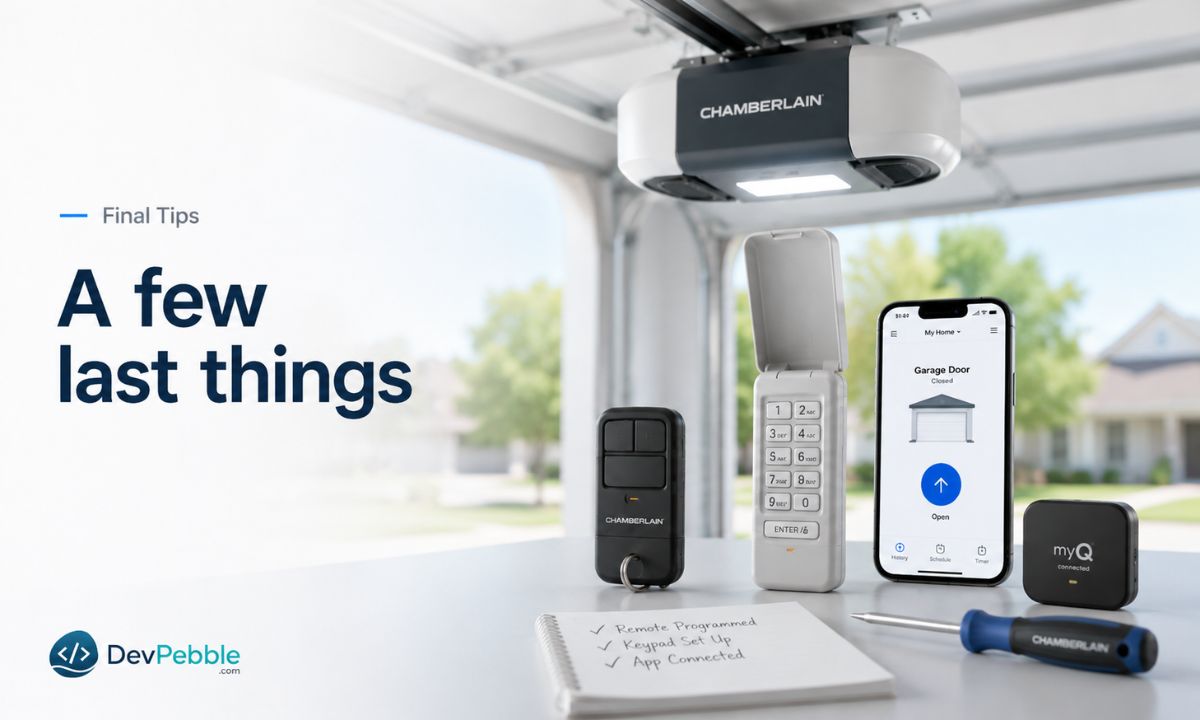
Chamberlain garage door opener programming really does come down to a short sequence: find the Learn button, run the right process for your remote, keypad, or the myQ app, and check compatibility before you start. Most setup headaches trace back to something small, like a tired battery, a mismatched accessory, or a Wi-Fi signal that needs a boost. Take it one step at a time instead of guessing and you will save yourself the frustration. Keep safety in the front of your mind throughout, stay clear of the door while testing, make sure the sensors are working, and reach for your model's manual whenever its steps drift from the general ones here. With those basics covered, most people can have an opener fully set up in just a few minutes.