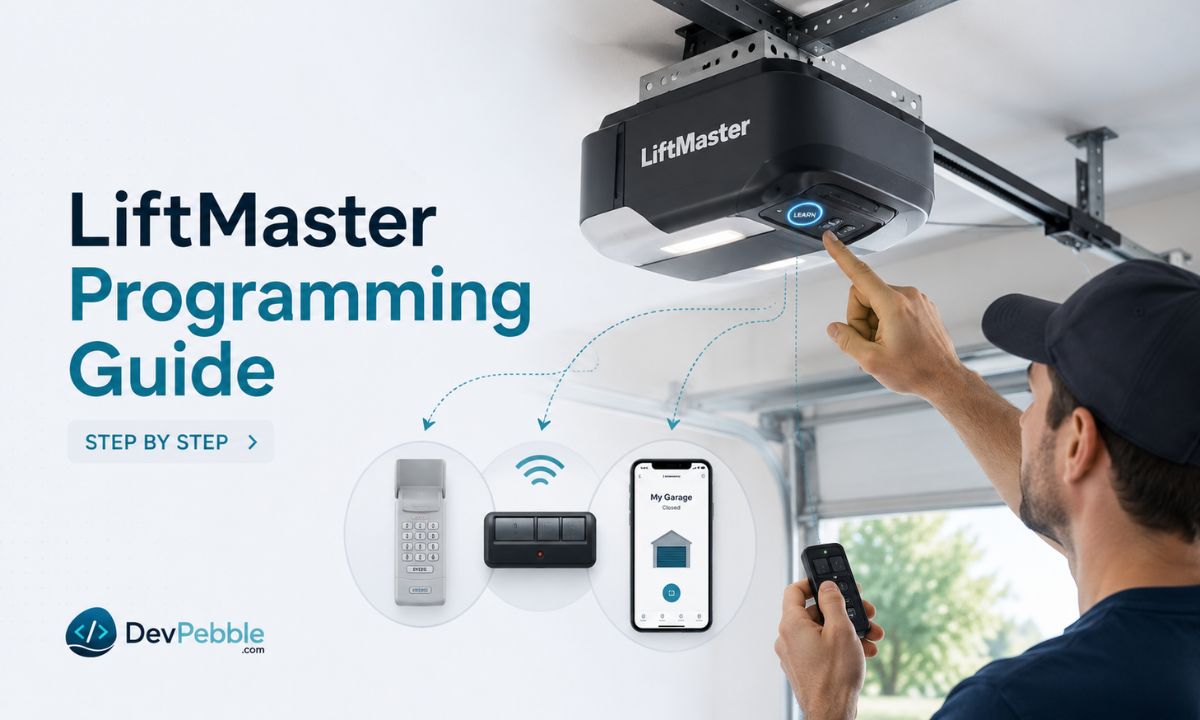
LiftMaster garage door opener programming: a complete step-by-step guide
A complete step-by-step guide to LiftMaster garage door opener programming — find the Learn button, decode its color, pair a remote, keypad, or the myQ app, change a keypad PIN, and fix a remote that won't program.
On this page⌄
- What is LiftMaster garage door opener programming?
- A few safety basics before you start
- How to find the Learn button on a LiftMaster opener
- LiftMaster Learn button colors and what they mean
- How to program a LiftMaster remote control step by step
- How to program a LiftMaster garage door keypad
- How to change or reset a LiftMaster keypad PIN
- How to connect a LiftMaster opener to the myQ app
- How to program more than one remote or keypad
- Why your LiftMaster opener won't program a remote
- When to reset, reprogram, or call a professional
- Conclusion
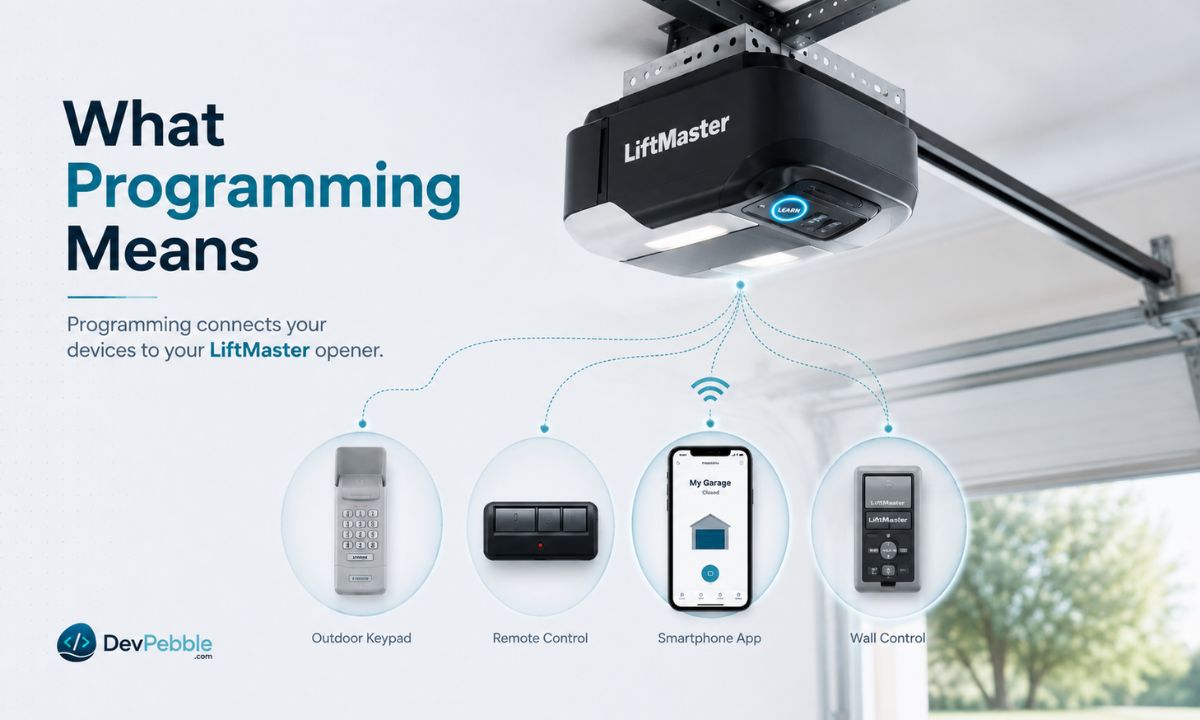
Setting up a new remote or reconnecting an old one shouldn't feel like a guessing game. Maybe you just installed a new opener, replaced a clicker that finally died, or added a keypad by the side door for the kids. Whatever brought you here, LiftMaster garage door opener programming is usually a five-minute job once you know where to look.
A modern LiftMaster setup can involve a few parts working together: handheld remotes, a wireless keypad, the Learn button on the motor unit, and smartphone control through the myQ app. Each one has to be introduced to the opener before it will do anything, and the steps below cover all of them.
This guide is current for 2026. Because LiftMaster has shipped dozens of opener models since the early 1990s, a few details (the Learn button color, the timing window, the exact light pattern) vary from one unit to the next. If something here doesn't match what you're seeing, check the model label on your motor unit or the manual on the LiftMaster or Chamberlain website.
What is LiftMaster garage door opener programming?
Programming is just the process of teaching your opener to recognize a device, like a remote, keypad, or phone, as one that's allowed to open and close the door.
Every LiftMaster motor unit has a small memory that stores accepted codes. When you press a remote button, it sends a unique signal. If that signal isn't already in the opener's memory, nothing happens. Programming adds the signal to the list of trusted devices, and that's really all it does.
The same idea covers a few common tasks: pairing a handheld remote, assigning a PIN to a wireless keypad, and connecting an accessory like a car's built-in garage button or a myQ smart hub. The reason the step exists at all is security. Without it, anyone with a similar remote could roll up and open your garage, so LiftMaster makes you approve each device by hand through the Learn button.
One thing worth knowing up front: this memory lives on the opener itself. If you ever reset the motor unit or replace it, every remote and keypad has to be reprogrammed, because the stored codes get wiped along with everything else.
A few safety basics before you start
A garage door is heavy and motorized, so treat programming like any other job around powered equipment. Keep people, pets, and objects out of the door's path before you test anything, since a successful pairing means the door will move the moment you trigger it. When you do test, stand off to the side rather than underneath or directly in front of the door. And if you'll be reaching the motor unit on the ceiling, use a stable step stool or ladder instead of stretching from a chair. None of this is dramatic, but it takes the one real risk in the process off the table.
How to find the Learn button on a LiftMaster opener
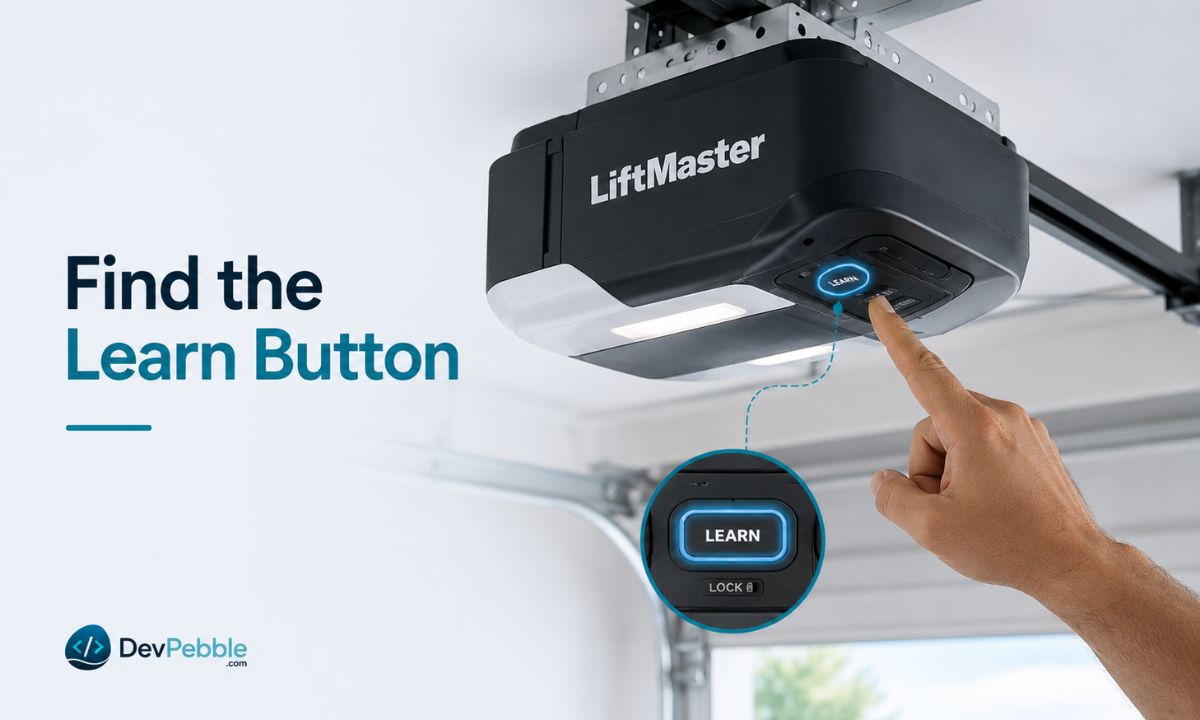
The Learn button is the key to nearly all of this, so it helps to know what you're hunting for. On most LiftMaster motor units (the box mounted to your garage ceiling) it sits on the back or side panel, usually near where the antenna wire hangs down or just behind the light lens. You'll often need to pull the light cover down or aside to see it.
The button color varies by model and is worth noting, because it tells you which remotes and accessories will work with your opener. You'll also see a small LED right next to it. That light matters during programming, since it confirms when the unit is listening for a new code.
If your opener was made before 1993, it may not have a Learn button at all. Those older units used DIP switches instead, a row of tiny sliders you set by hand on both the opener and the remote. Anything made from 1993 onward should have the Learn button described here.
LiftMaster Learn button colors and what they mean
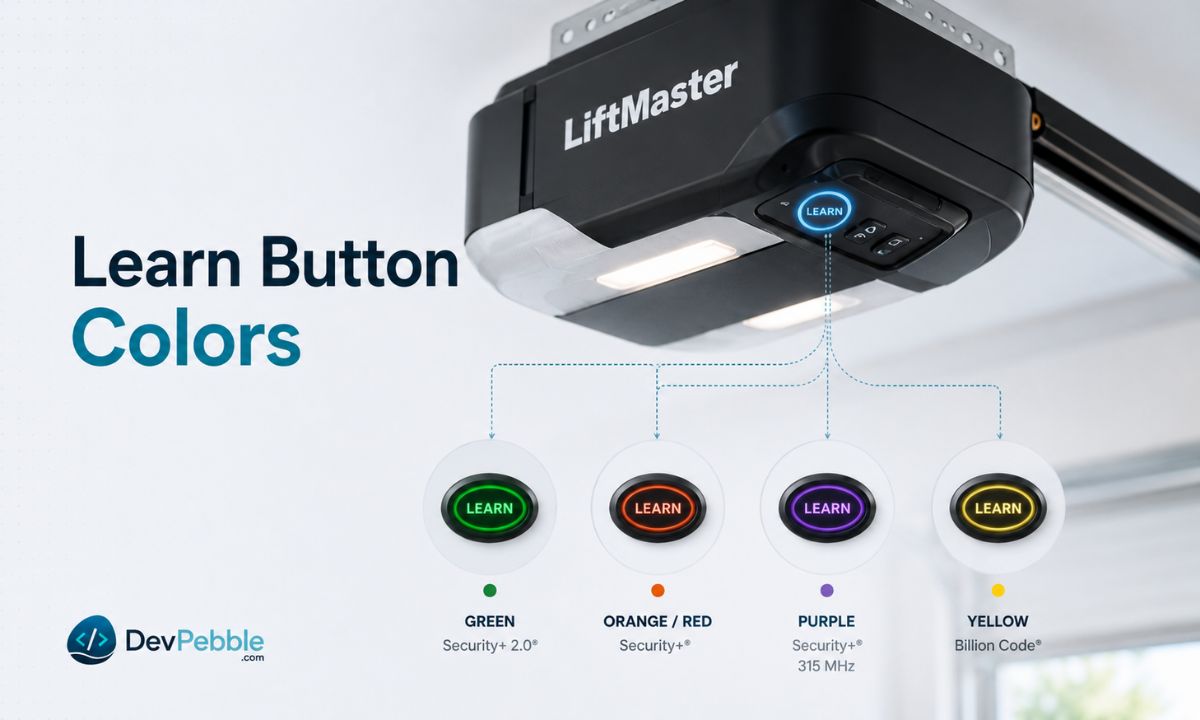
The color isn't decorative. It maps to the radio frequency and code system your opener uses, which is exactly what you need to know before buying a remote or keypad. Here's how the common colors line up, oldest to newest:
Green: the oldest of the bunch, found on some mid-1990s units running 390 MHz with Billion Code technology.
Red or orange: 390 MHz Security+ rolling code, common on openers from the late 1990s through the mid-2000s.
Purple (sometimes called lavender): 315 MHz Security+ rolling code, mostly from around 2005 to 2011.
Yellow: Security+ 2.0, used from roughly 2011 to today. These are multi-band units, and a yellow Learn button is your best sign that the opener supports the myQ app.
The practical takeaway is that remotes and openers have to match generations. A remote built for a purple-button opener won't pair with a yellow-button one, and so on. If you're buying a replacement, match it to your button color or look for packaging that names your system directly. When in doubt, the model number on the motor unit and LiftMaster's compatibility tool will settle it for certain.
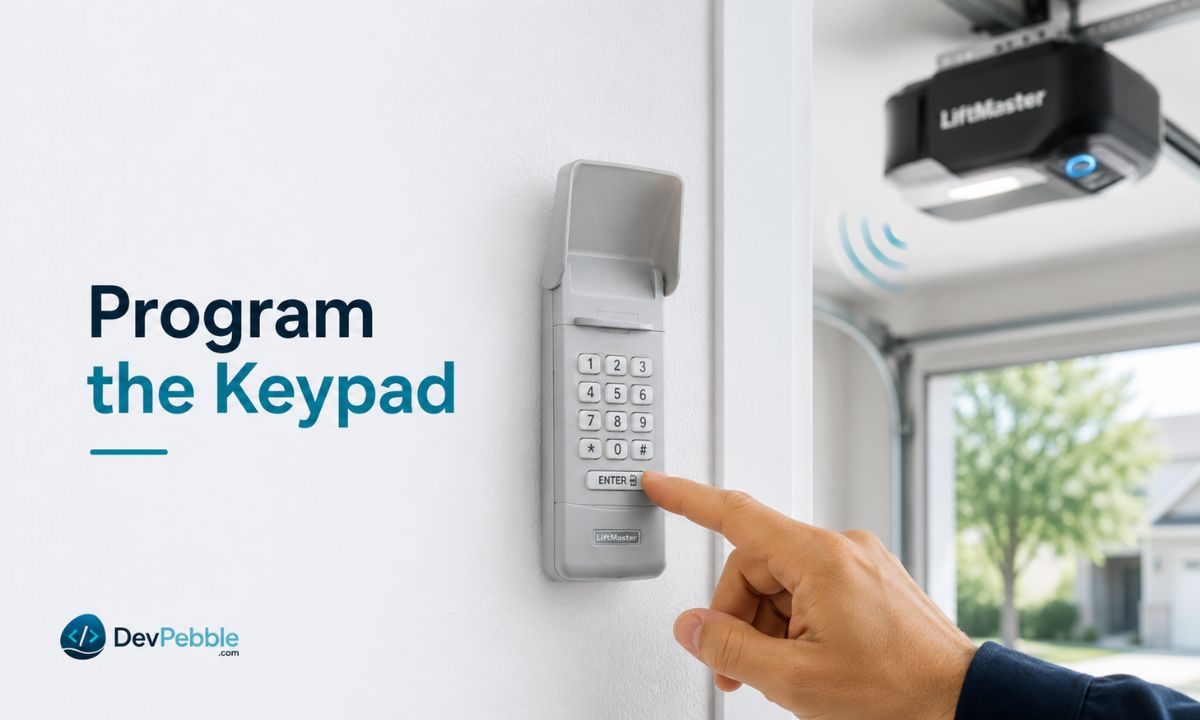
How to program a LiftMaster remote control step by step
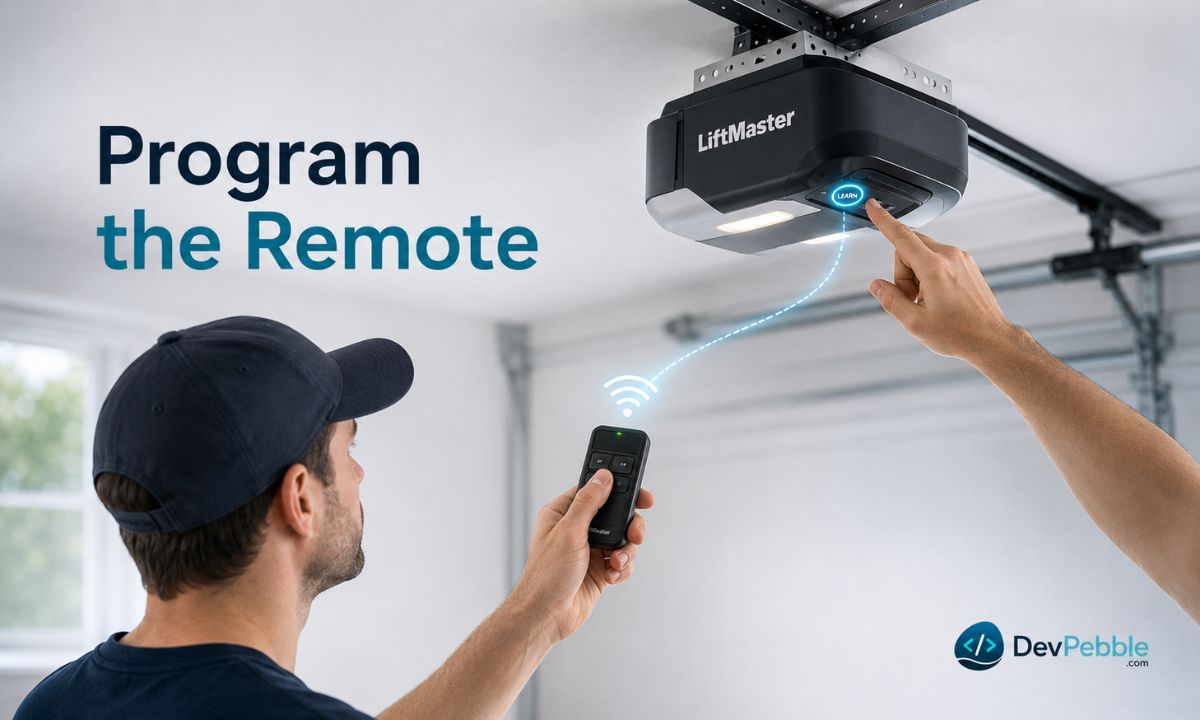
Once you've found the Learn button, pairing a basic remote is quick:
- Find the Learn button on the motor unit, as described above.
- Press and release it. The LED beside the button usually lights up steadily and stays on for about 30 seconds. That's your window. (Some newer yellow-button models give you up to two minutes, so don't panic if yours behaves a little differently.)
- While the light is on, press the remote button you want to use, hold it for a second or two, then let go.
- Watch and listen for confirmation. The opener light may blink or you might hear a couple of clicks, which means the remote is in.
- Test it from a few feet away to make sure the door opens and closes the way it should.
If the remote doesn't pair after a couple of tries, the usual suspects are a weak battery or a remote that doesn't match your opener's generation. Check both before assuming something is broken.
How to program a LiftMaster garage door keypad
A wireless keypad mounted outside the garage is one of the handiest additions you can make, since it lets anyone you trust get in without carrying a remote. The logic is the same as remote pairing, just with a PIN instead of a button press:
- Find the same Learn button you used for the remote.
- Press and release it to put the opener in pairing mode, usually for about 30 seconds.
- On the keypad, enter a four-digit code (some keypads accept longer ones) and press Enter.
- Look for the opener's LED to blink, confirming the code was accepted.
- Test the new PIN by entering it and pressing Enter again, standing clear as the door moves.
Keypad steps drift more between models than remote steps do. Some keypads want you to hold Enter for a few seconds first, others ask for a specific key combination before the code. If your keypad shipped with its own instruction sheet, keep it, because LiftMaster has released several keypad versions over the years with slightly different sequences.
How to change or reset a LiftMaster keypad PIN
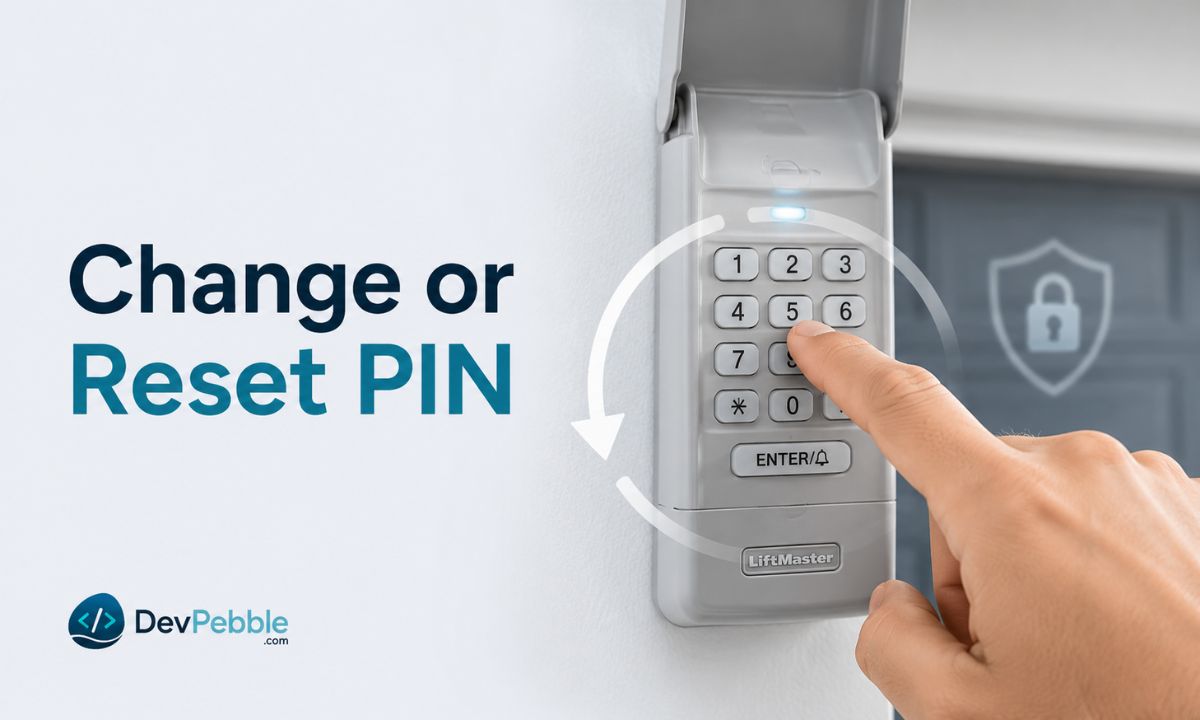
There are plenty of everyday reasons to swap a keypad PIN. You might have just moved in and want the previous owner's code gone, shared your PIN with a contractor and want to cut off access afterward, or simply forgotten the old number.
Changing it works almost exactly like the original setup. Press the Learn button, and while the LED is active, enter a new PIN on the keypad and press Enter, then test it. In most cases this just adds the new PIN as another accepted code rather than overwriting the old one. To wipe everything (all keypads and remotes included), hold the Learn button down longer, around six seconds, until the LED goes out. That full erase clears every paired device, not just the keypad, so reprogram at least one remote right afterward or you'll be stuck using the wall button.
When you pick a new code, go for something you'll remember but a stranger wouldn't guess. Skip obvious sequences like 1234 or four of the same digit, and don't use your house number or a birth year. A little thought here keeps the convenience without leaving the door easier to open than it should be.
How to connect a LiftMaster opener to the myQ app
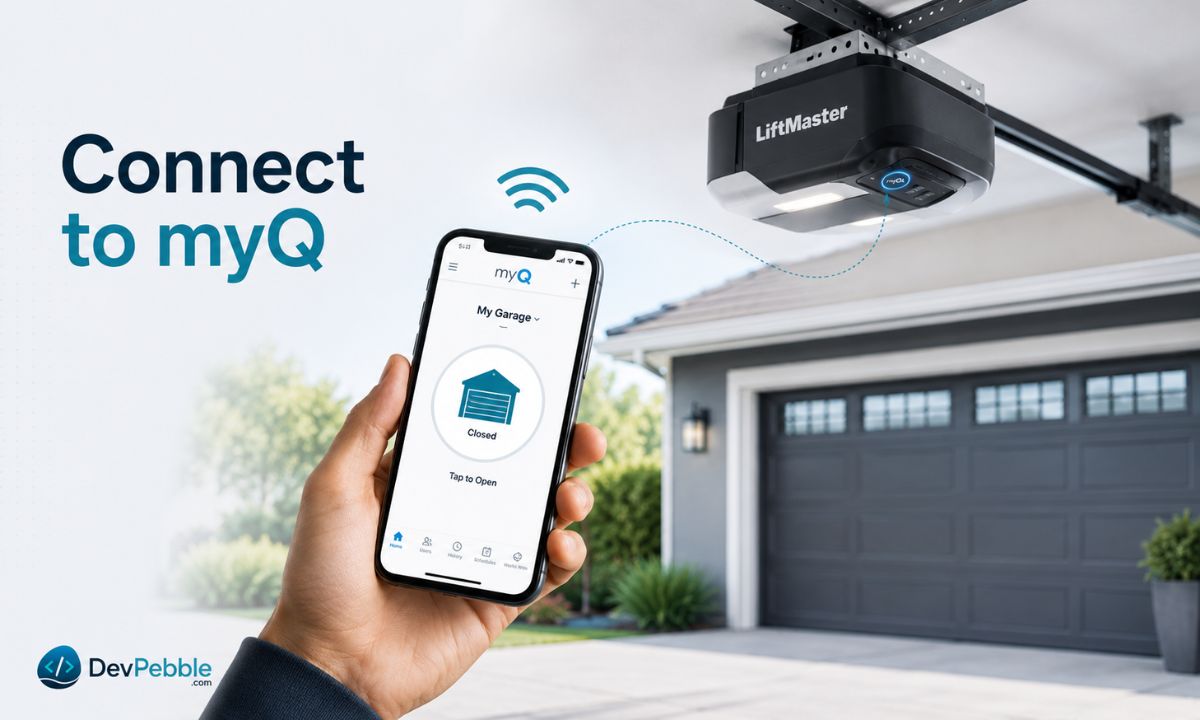
If your opener has Wi-Fi, the myQ app lets you check, open, and close the door from your phone wherever you are. Here's how setup goes:
- Confirm your opener can do this. Newer LiftMaster units have Wi-Fi built into the motor head; older ones need a separate myQ Smart Garage Hub to get app control. A yellow Learn button is a good sign yours supports it.
- Download the myQ app and create a free account.
- In the app, add a device, choose garage door opener, and select your model so it knows whether it's pairing with a built-in radio or a hub.
- Put the opener into Wi-Fi mode. On most units you press the Learn or Wi-Fi button until the blue LED blinks slowly, which means it's broadcasting a temporary setup network.
- Connect it to your home network through the app. This is where most setups stall: myQ needs the 2.4 GHz Wi-Fi band, not 5 GHz, and a steady signal out in the garage. If your router lumps both bands under one network name, you may need to separate them, or add a Wi-Fi extender if the signal is weak that far from the router.
- Finish the in-app steps, then test by opening and closing the door from your phone once before you rely on it.
After it's linked, myQ also handles activity alerts, scheduling, and sharing access with people you trust through their own logins. The app itself is free; only the hardware costs anything.
How to program more than one remote or keypad
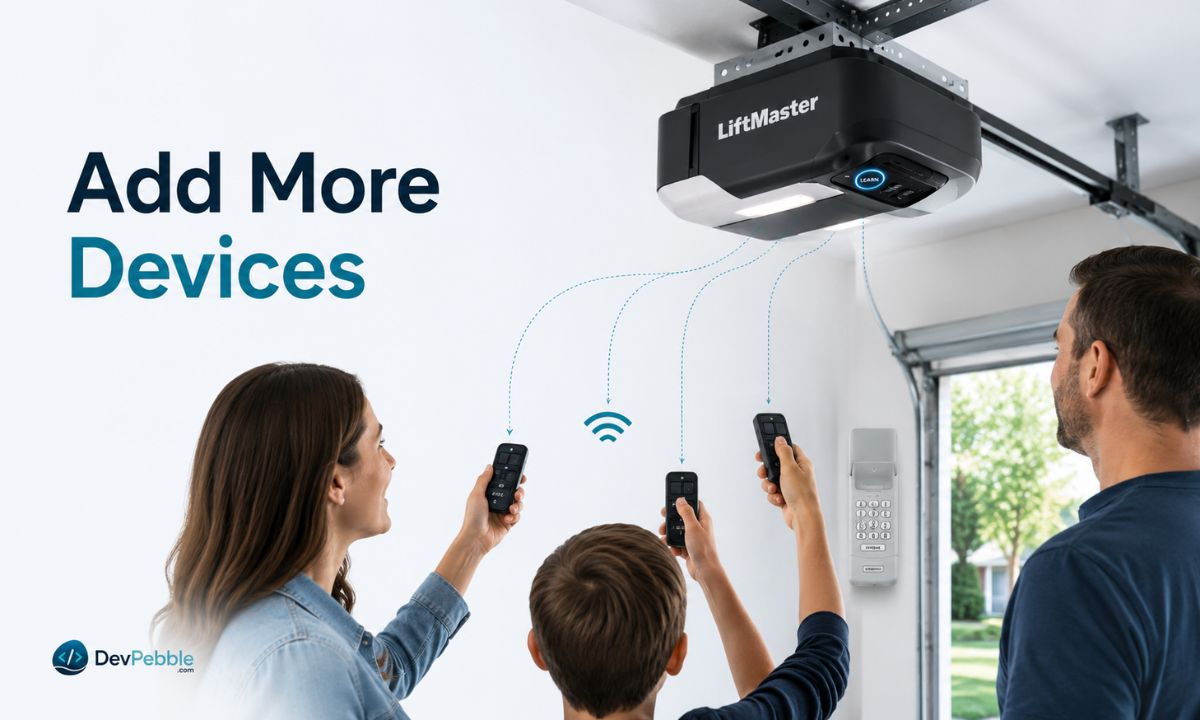
Most households end up with several ways in: a remote for each driver, a built-in button in the car, and a keypad by the door for the kids or a dog walker. LiftMaster openers are built to hold several devices at once, and you add each one with the same Learn button routine. There's no bulk-add shortcut, so it's a quick pairing per device.
That one-at-a-time design is actually handy. Because each device is its own entry in memory, you can later remove or reprogram a single lost remote without touching the others. Just keep a rough count, since every opener has a memory limit, even though typical homes rarely come close to it.
Why your LiftMaster opener won't program a remote
If a remote or keypad refuses to pair, you're in good company, because this is one of the most common headaches homeowners hit. The usual causes are short and worth running through in order:
- A weak or dead remote battery, by far the most frequent culprit. Swap it before troubleshooting anything else.
- A generation mismatch. A purple-button remote won't pair with a yellow-button opener, so check that your remote matches your Learn button color.
- Missing the timing window or pressing buttons in the wrong order.
- A full memory. If the opener has hit its code limit, clear an old entry before adding a new one.
- A dropped or 5 GHz Wi-Fi connection, specifically during myQ setup.
- For keypads, entering the PIN too slowly or pressing Enter a beat too early.
- Interference from other electronics sitting close to the motor unit.
- Following instructions written for a different model.
If none of that does it, comparing your exact model number against LiftMaster's official documentation is the fastest way to rule out a quiet compatibility mismatch.
When to reset, reprogram, or call a professional
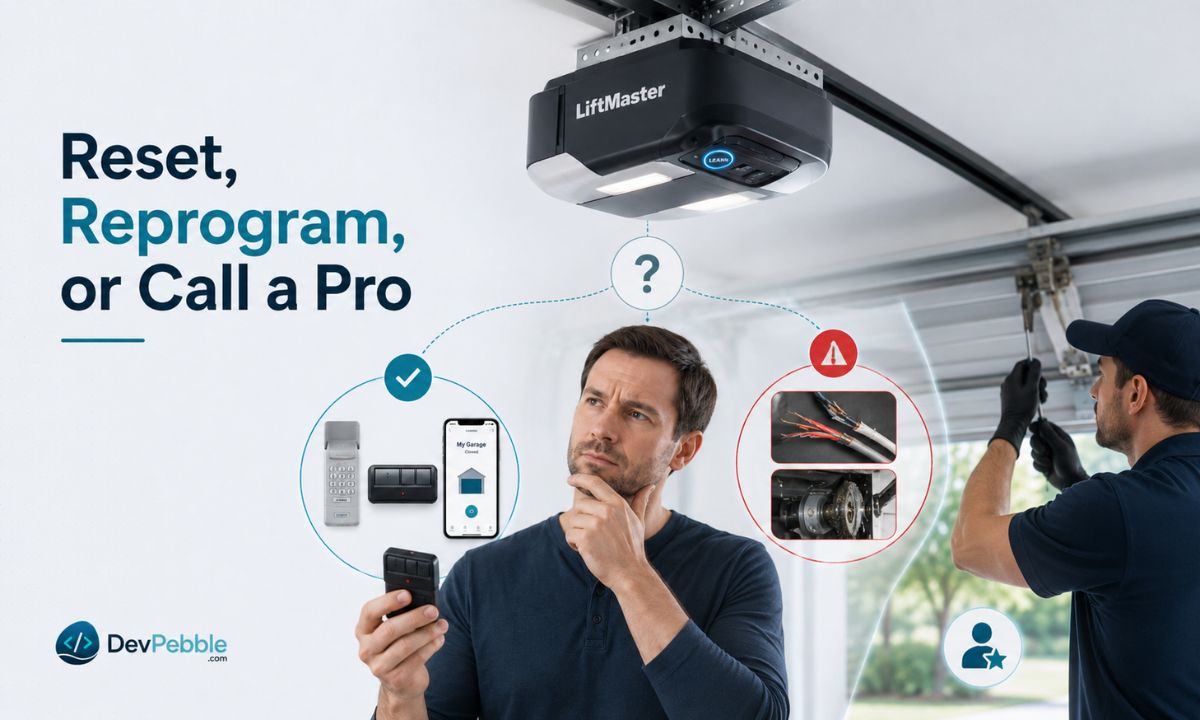
Matching the fix to the situation saves a lot of time. Simple reprogramming is enough when you're adding a remote, replacing a lost one, or setting up a new keypad PIN, since it only touches the device you're working on.
A full memory reset makes sense in fewer cases, mainly when you've moved into a new home and want a previous owner's remotes gone, or when you've lost track of how many devices are paired and want a clean slate. Remember that resetting clears everything, so every remote and keypad will need reprogramming afterward.
Some jobs are past the point of programming, and that's when a technician earns the call. Bring one in for repeated failures even after you've followed the right steps, visibly damaged or frayed wiring near the opener, a door that feels unbalanced or unusually heavy to lift by hand, or motor trouble like grinding and stalling. Two things in particular are not DIY territory: don't adjust the force or travel settings unless you fully understand them, since wrong settings change how the door reacts to an obstacle, and never disconnect or bypass the safety sensors near the bottom of the tracks. Those sensors stop the door when something is in the way, which matters most in homes with kids or pets.
Conclusion
Most of LiftMaster garage door opener programming comes down to a handful of moves: find the Learn button, check its color so you know what your opener will accept, then pair each remote, keypad, or phone one at a time. When a device won't cooperate, start with the battery, the Wi-Fi band, and how you're entering the PIN, because those three account for most failures.
Save the phone call for anything involving wiring, the motor itself, or the safety sensors. And since the small details shift from one model to the next, keep your model number handy and check it against the official LiftMaster or Chamberlain manual whenever something doesn't line up.